Toilet Installation
Click on an image to see a larger version
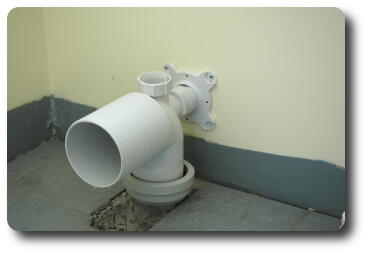
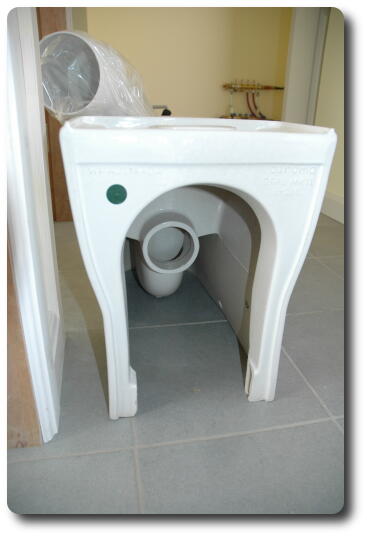
 The arse end of a toilet. These are 'flush to wall' style,
eliminating the hard to clean and untidy rear end of a standard pan.
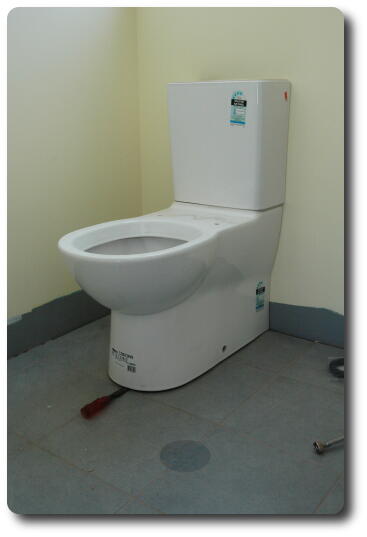
This toilet is lopsided; it's visible here, though at first that
seemed to be just a consequence of the angle. See the next page for
a frontal view.
The arse end of a toilet. These are 'flush to wall' style,
eliminating the hard to clean and untidy rear end of a standard pan.
This toilet is lopsided; it's visible here, though at first that
seemed to be just a consequence of the angle. See the next page for
a frontal view.
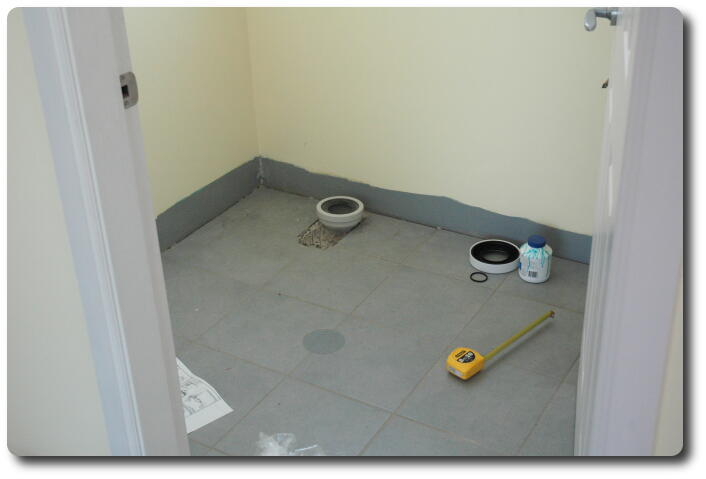
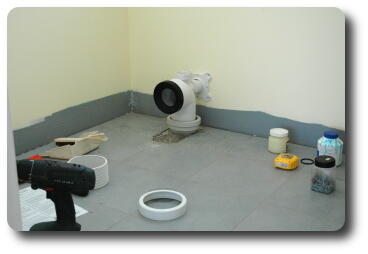
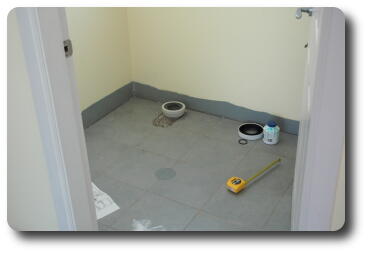 The powder room, ready to have a toilet installed. The former
pipe protruding from the floor has been cut off, and the connecting
piece on the left is placed in the pipe, rotated to the correct
position (the upper - visible - part is not centred on the piece
which fits into the drain, thus allowing adjustment of the spacing),
glued and ready for the next step.
The powder room, ready to have a toilet installed. The former
pipe protruding from the floor has been cut off, and the connecting
piece on the left is placed in the pipe, rotated to the correct
position (the upper - visible - part is not centred on the piece
which fits into the drain, thus allowing adjustment of the spacing),
glued and ready for the next step.
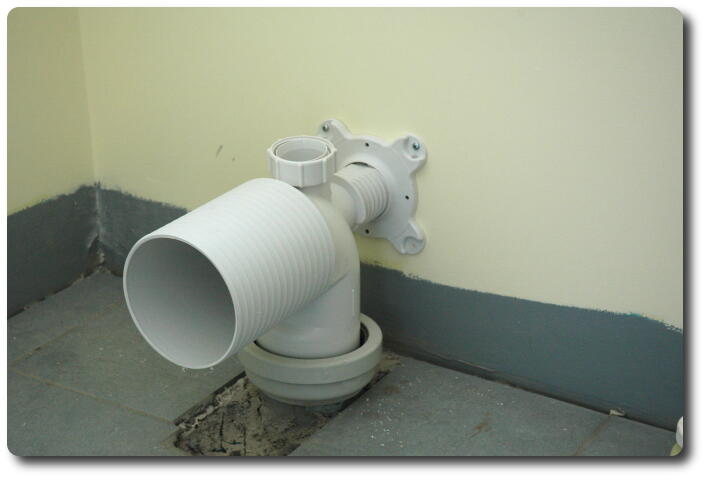
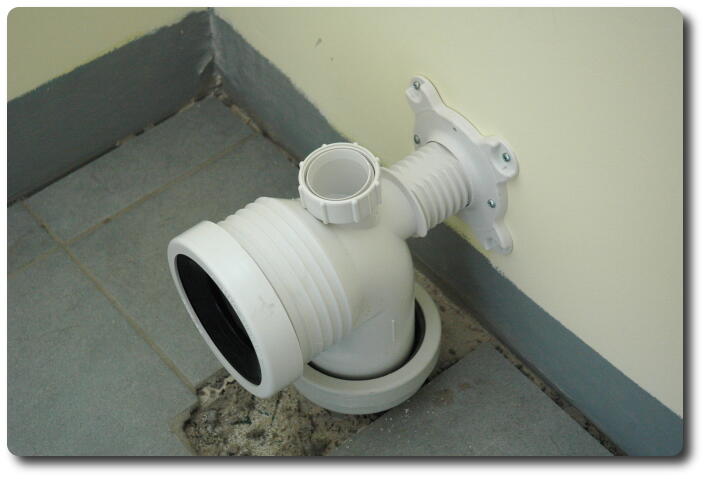
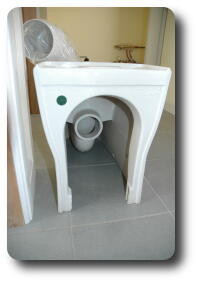
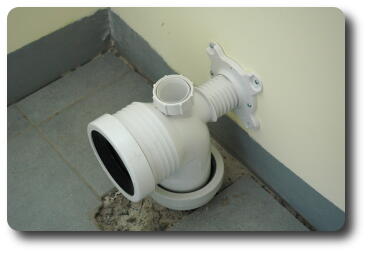
 The universal connection piece! The piece at the rear is trimmed
to fit then attached to the wall with a couple of screws.
The small piece leading upwards is for those older systems requiring
a vent pipe from the pan. Not required here. And the piece running
to the left connects to the back of the pan.
The universal connection piece! The piece at the rear is trimmed
to fit then attached to the wall with a couple of screws.
The small piece leading upwards is for those older systems requiring
a vent pipe from the pan. Not required here. And the piece running
to the left connects to the back of the pan.
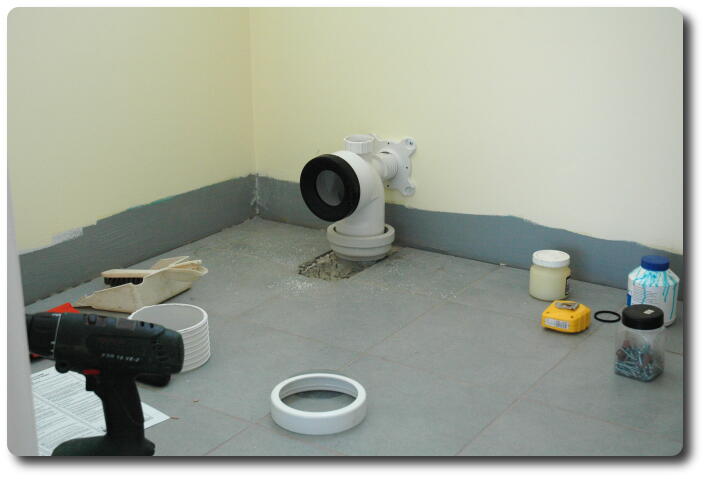
 Now the front piece has been trimmed to match the pan, and has its
ceiling gasket installed.
Now the front piece has been trimmed to match the pan, and has its
ceiling gasket installed.
 Now all ready to accept the pan.
 The pan installed. At this stage, the pan is just sitting on the floor,
without being attached.
The pan installed. At this stage, the pan is just sitting on the floor,
without being attached.
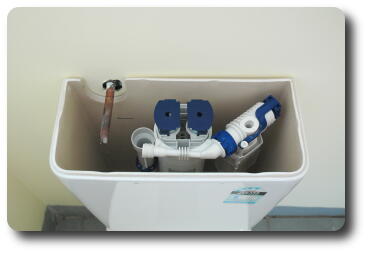 The inside of the cistern. The water (from the bladder!) comes in on
the left, so there is no visible plumbing for the whole toilet.
And the two buttons on top are for small and full flush (3 litres,
and 4.5 litres, respectively, I believe).
The inside of the cistern. The water (from the bladder!) comes in on
the left, so there is no visible plumbing for the whole toilet.
And the two buttons on top are for small and full flush (3 litres,
and 4.5 litres, respectively, I believe).
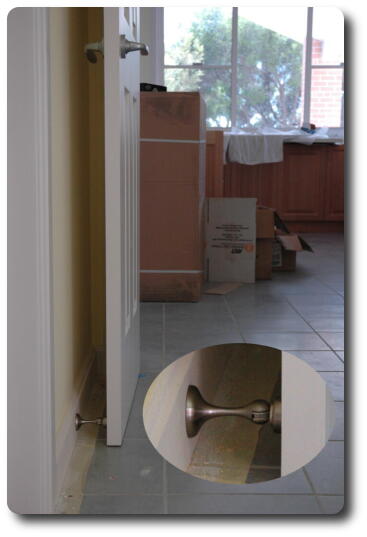
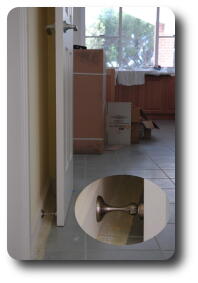 While Dave was playing with toilets, Ryan was installing door stops.
They are Bunnings (think Home Depot, Lowes for those in N America)
Chinese special. Like most such stores, they rarely have enough of
what's needed. In this case, there were just enough, though not
all the ones in the box were the same! They're magnetic locks, so
the doors stay open! The inset oval shows a close up of the actual
stop. The round head makes alignment between the two pieces
less of an issue.
While Dave was playing with toilets, Ryan was installing door stops.
They are Bunnings (think Home Depot, Lowes for those in N America)
Chinese special. Like most such stores, they rarely have enough of
what's needed. In this case, there were just enough, though not
all the ones in the box were the same! They're magnetic locks, so
the doors stay open! The inset oval shows a close up of the actual
stop. The round head makes alignment between the two pieces
less of an issue.
 The arse end of a toilet. These are 'flush to wall' style,
eliminating the hard to clean and untidy rear end of a standard pan.
This toilet is lopsided; it's visible here, though at first that
seemed to be just a consequence of the angle. See the next page for
a frontal view.
The arse end of a toilet. These are 'flush to wall' style,
eliminating the hard to clean and untidy rear end of a standard pan.
This toilet is lopsided; it's visible here, though at first that
seemed to be just a consequence of the angle. See the next page for
a frontal view.